DIY Summer School Part 2: Bamboo Bicycle Build
Originally posted on April 22, 2019 at 12:00 pmJim Gaffigan has a bit at the end of one of his early stand-up performances that starts off, “I like wood!” Of course he’s speaking euphemistically, but with the general sentiment, I agree. I also relate to the old-man voice he puts on in the bit.
Anyway, wood has always intrigued me and although I’m not much of a carpenter or craftsman, I’ve somehow managed to build a few things that are still around. Along with my love and interest in wood has grown my interest in bicycles and the physical production of them. Not the geometry and numbers part of the building process, but the actual mating of materials to make a useful thing — that intrigues me.
It should come as no surprise, then, that when offered the chance to build a bamboo bike, I jumped at the opportunity. Even though bamboo is technically a grass. More on that in a bit.
Calfee Designs
For those of you who follow the handmade-bicycle scene, or are generally knowledgeable about the various small builders littering the country, the name Craig Calfee will be familiar to you. For everyone else, just think genius bike builder who has won a lot of design awards and helped kick off the bamboo-bike craze a couple of decades ago.
In addition to his carbon and bamboo bike offerings, Calfee also does carbon repair, works on special projects (like building solar-powered bikes) and offers DIY bamboo kits to the public, which in this case means me.
The kit
The DIY bamboo bike kits come with just about everything you need to build yourself a frame and are available in a number of different styles to suit your needs. From road to city, mountain to BMX, or totally custom, there is a build kit for you.
While the DIY kits sound like a single homogeneous entity, they’re really split into three parts: Tool Kit, Frame Materials Kit, and Drawing Kit.
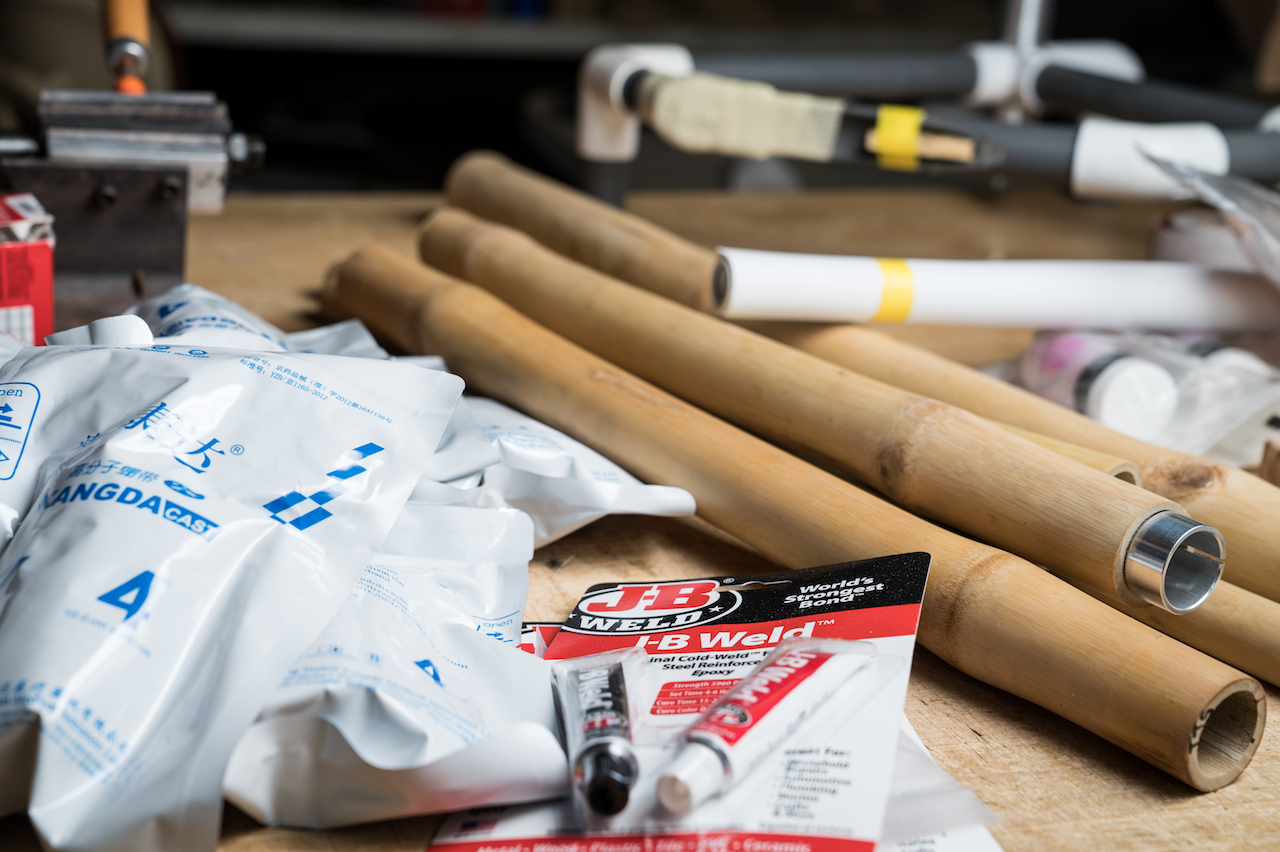
The Frame Materials Kit ($220) provides the things that actually make up the frame: rough-cut, sanded bamboo tubes; glue (J-B Weld); casting tape; head tube; seat-tube insert; bottom-bracket shell; and dropouts. These are all things that will be part of your new bike when all is said and done.
The Tools Kit ($600 to purchase, $100 to rent or $340 without the mitering jig) provides the things to help measure, cut and support the frame materials throughout the process. It includes mitering jig; hole saws; rear-triangle jig; moveable head-tube, seat-tube, and bottom-bracket jig; speed square; angle finder; tire-clearance checker; and crankset-clearance checker.
The brilliant (and sustainable) twist here is that Calfee actually rents the Tools Kit to you, charging $600 upon ordering and refunding you $500 if you send the stuff back. If you choose to keep it, then the charges remain. If you send them back, they’ll go on to help someone else goof around.
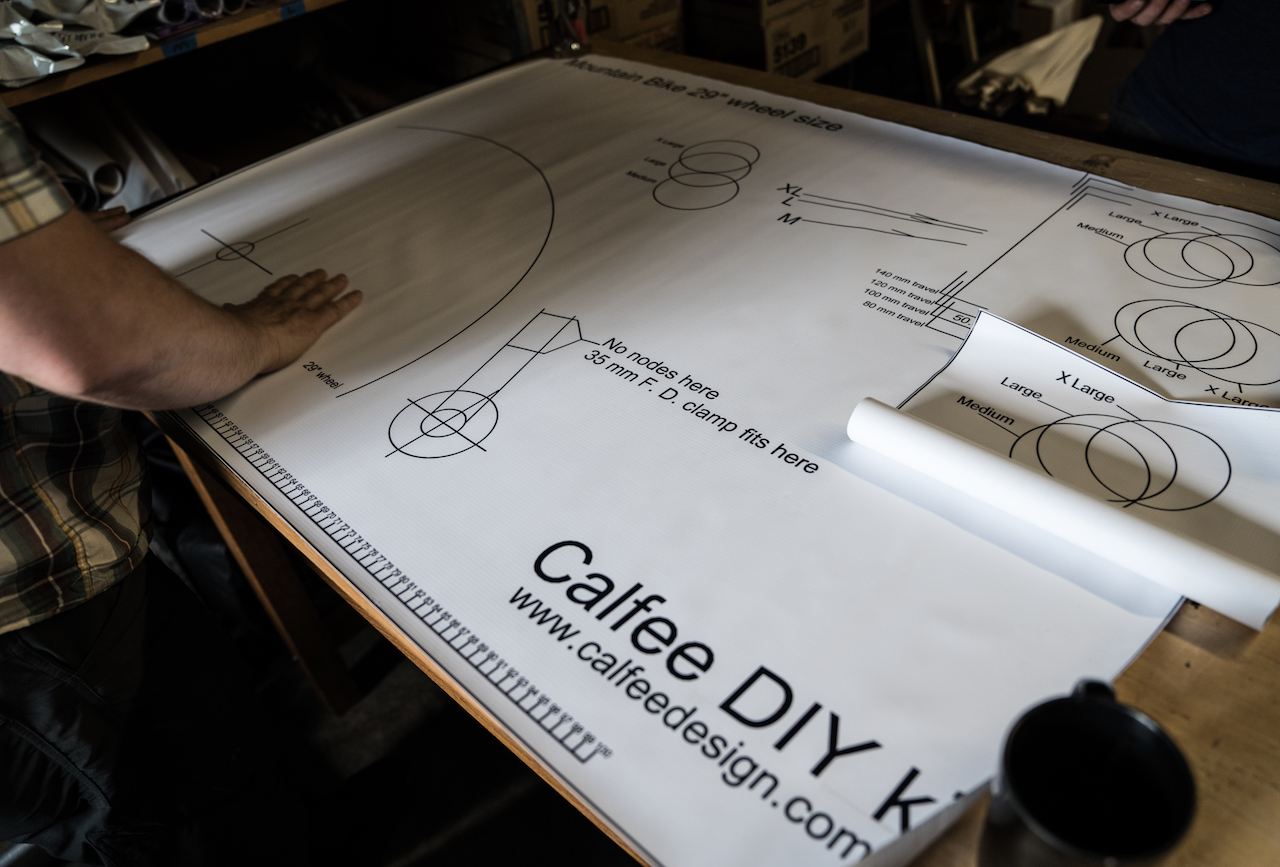
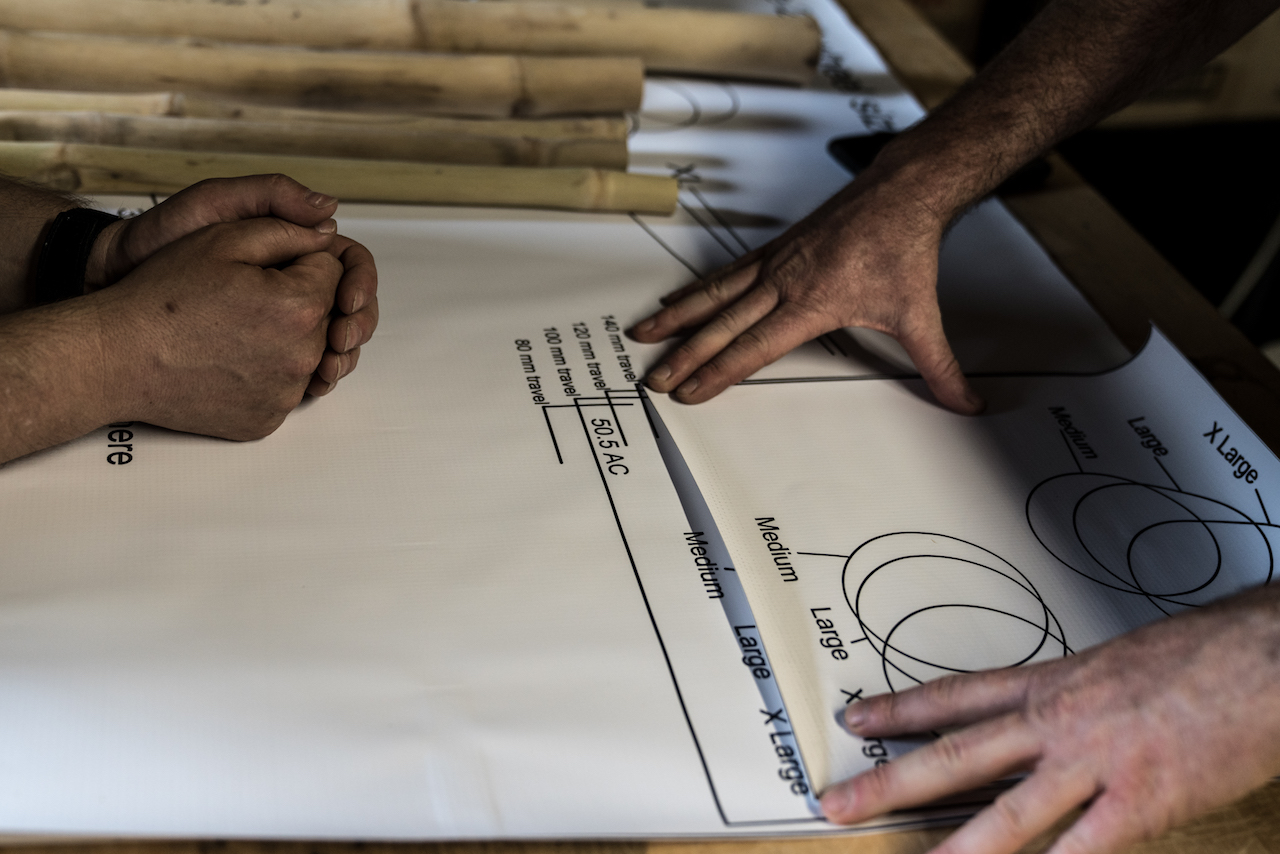
The Drawing Kit ($35) is a life-size drawing of your chosen frame type digitally printed on vinyl banner stock, with jig-placement instructions for various geometries and fork travels (for mountain bikes).
In addition to the kits, Calfee has endeavored to film every facet of the build process to help the would-be DIYer better understand how to engage with the system. The only criticism I have of the videos is that, like watching most professionals do something, Calfee makes the process look a little too easy. Still, they are an incredible resource and certainly help make you feel like you have a mentor in the room.
The build
As with any new project, I was excited to get started. There was a little trepidation after unloading the various tools and packages housed within the kits, but excitement returned in short order.
Laying down the drawing, finding the corresponding geometry templates for the size bike I wanted to build and laying out the front-triangle jig was more or less painless. The Tools Kit is made up of fixtures that are built using PVC plumbing supplies, and while it may seem a little low-tech, realize that if they break, any decent big-box hardware retailer can have you back up and running in no time.
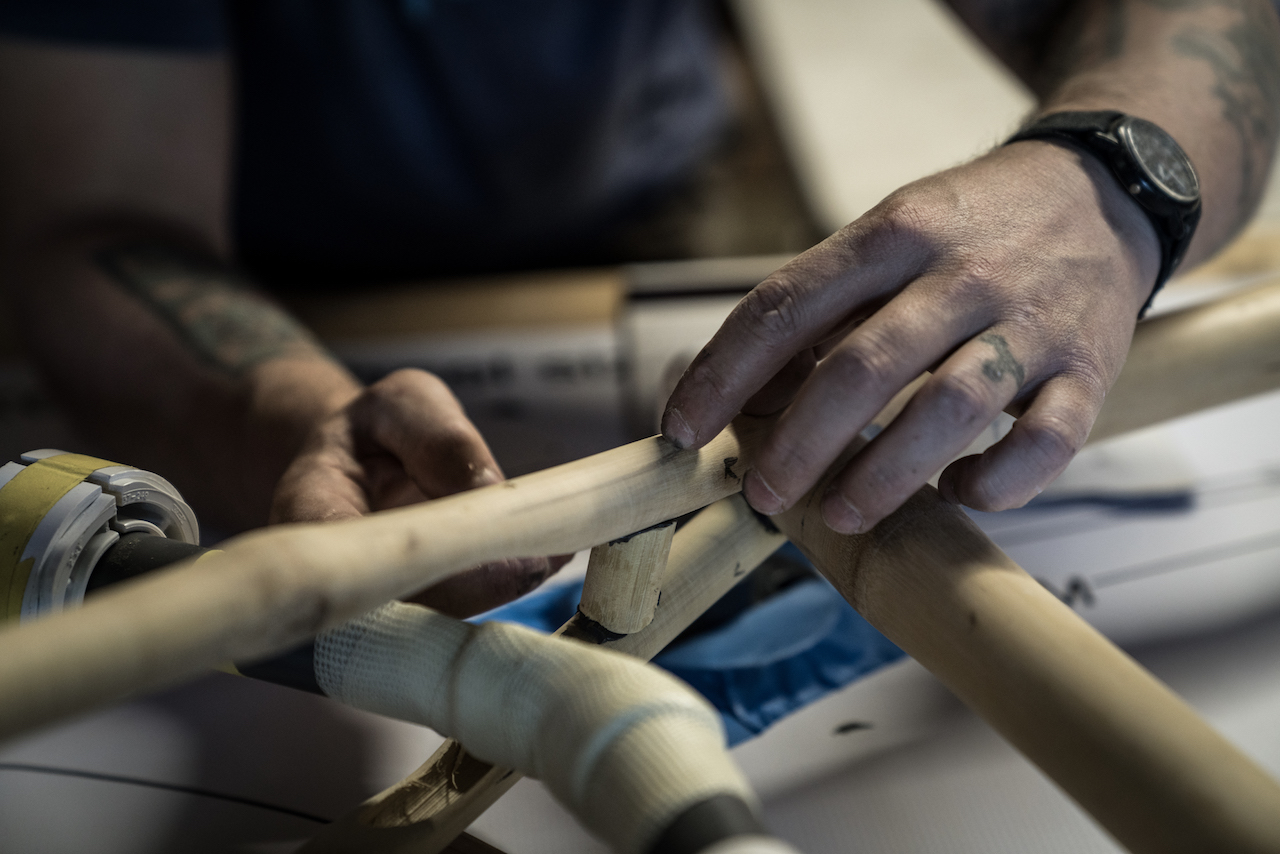
The videos mentioned previously not only help orient you and show examples of the work, but are also sequential, so figuring out where to start is as easy as loading the first in the series. In this case, you start with mitering the seat tube and work your way through the front triangle.
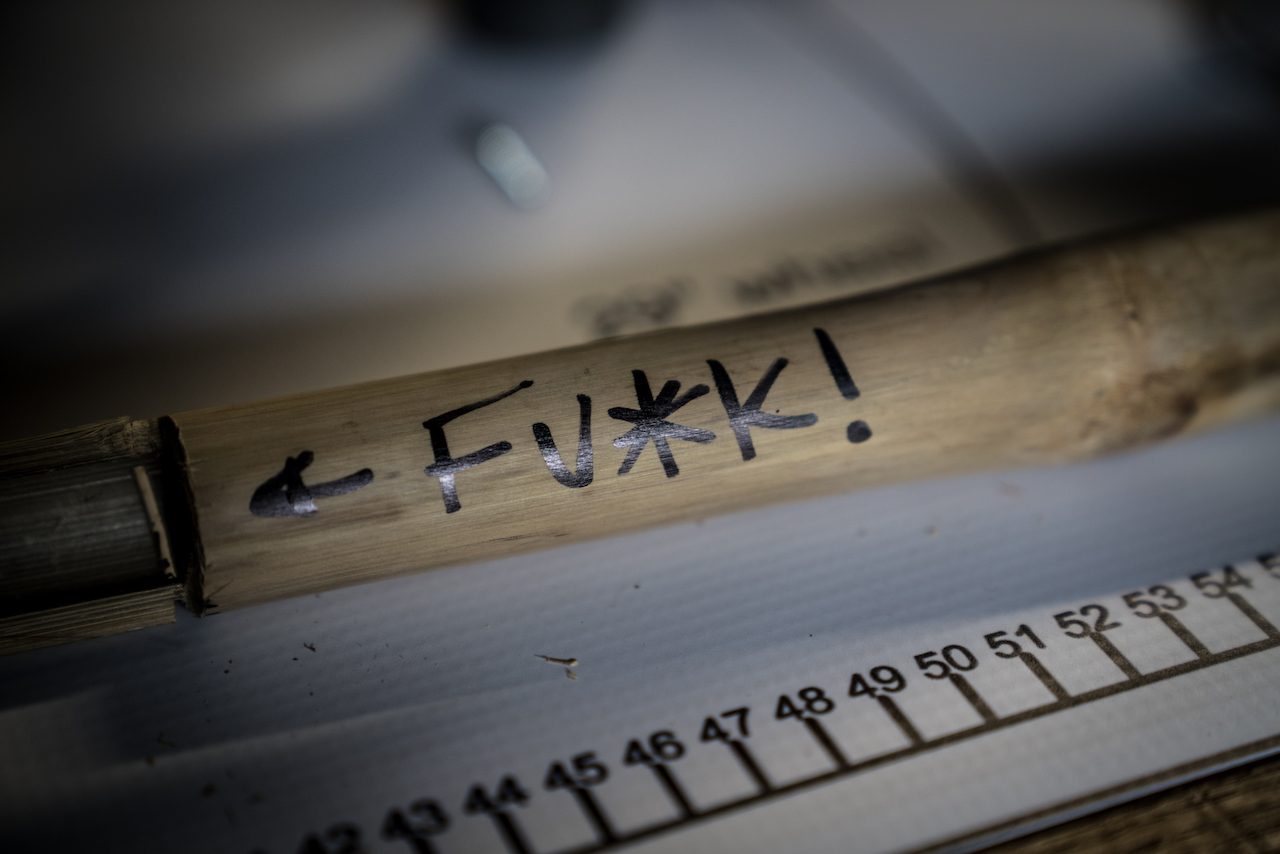
With the front triangle mitered and fitted, you move on to the stays and dropouts, which for me was the most nerve-wracking step and consequently where I made my one big mistake. I ended up marking and cutting the slot for the brake-side dropout on the wrong side. Without a way to fix it, I had to ask Calfee to send another stay, which he did. Should you find yourself in a similar position, realize that the rough-cut and sanded tubes are going to run you only about $20 with shipping. Not the end of the world, but it certainly held up progress with my build.
After everything is mitered, fitted and sanded, you want to check the clearances for crank arms, chainrings, and tires. To do this, you simply use a few more low-tech items in the Tool Kit and get on with carving out space where needed. In my case, I had to sand away a decent scoop for the drive-side chainring and two rather generous scoops on the seatstays for tire clearance.
From here you move on to the “tack weld” stage, wherein you apply J-B Weld to all of the joints and refit the whole thing together. This part stressed me out a bit going in but ended up being OK. The working time with J-B Weld is long enough to get things in place without too much fuss. The trick is getting enough on to fill the seam of each joint without putting so much on as to have a big mess. I had mixed results.
Once the J-B Weld cures, you can remove your frame from the fixtures and for the first time see what you’ve accomplished. It’s pretty rad to hold it in this form, as you can see what the final outcome will be. After admiring your handiwork, you file down any rough spots and refill any holes that may have developed as the J-B Weld set up. After everything is tacked and smooth, you move on to top taping.
Funnily, when I removed all of these packages labeled “Casting Tape,” it didn’t dawn on me that it was literally tape used in the wrapping of broken limbs. In retrospect, that seems obvious. Anyway, casting tape is activated by humidity, so to really get it going, you remove it from its package, dunk it in water, squeeze out the excess and apply it to one of the joints, smoothing and pushing out any bumps or voids as you go along. The catch is that you have between three and five minutes before the tape goes off and is rendered immobile. To help combat this, Calfee recommends cutting each package in half and stowing the unused portion in a zip-closure bag. This does help reduce waste, but it doesn’t make it any less stressful when applying the stuff.
The tape hardens in less than 10 minutes and can be sanded smooth shortly thereafter. Calfee has recently added a two-part epoxy step after the initial sanding meant to seal and harden the casting tape before final sanding. If you’ve ever used Bondo epoxy resin, then this step won’t prove to be all that challenging. If you’re unfamiliar with the process, it’s relatively easy: Simply add one part hardener to two parts resin, stir and apply the fluid to the entirety of the casting tape with a disposable paintbrush. Let the epoxy set overnight before moving on to the next step.

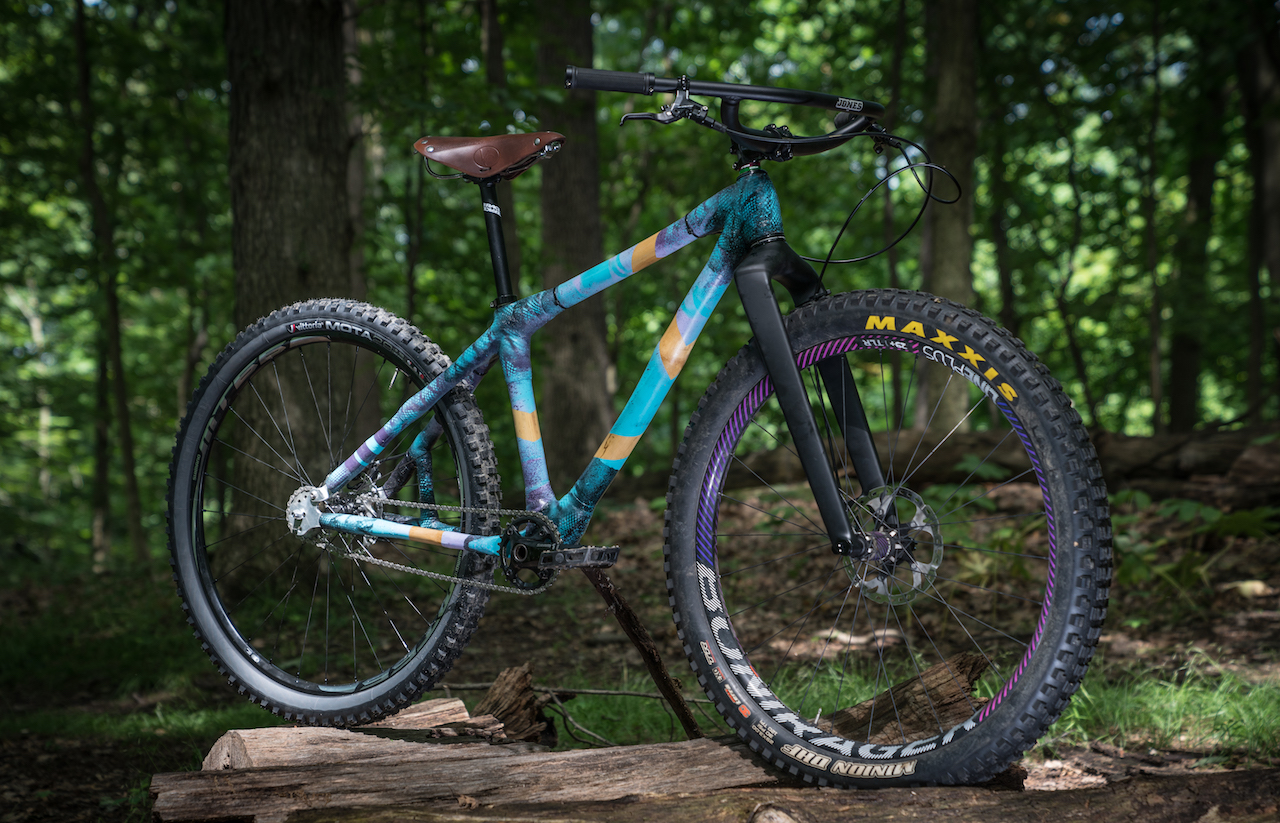
After the epoxy has hardened, you can fill in any low spots or small voids with any sort of body filler to help smooth the overall complexion. This isn’t totally necessary, but if you’re going for ultra-smooth transitions, you might want to consider it. Give the whole bike a few more rounds of sanding with a finer and finer sandpaper, and paint or clear-coat as you see fit. I hit mine with lots of spray paint, wheat-pasted graphics, and clear-coat.
The ride
TBD
Conclusions
I had a lot of fun working on my bike. I already had a deep respect for bike builders and craftsmen in various trades, but doing it yourself really emphasizes how talented the pros are. I’d say this is a great project for anyone who wants the experience of building their own bike. The skills needed are few. If you have patience and the willingness to give something a try, you can make a bamboo bike. Of course, the more experience you have working with wood and/or the tools you use in the process, the better off you’ll be, but with the instructional videos, I think anyone could do this and I highly recommend that you do.