DIY Summer School Part 1: Frame Building
Originally posted on April 19, 2019 at 4:20 amEditors Note: Originally this feature appeared in issue 206, this is Part 1 of a three-part series of DIY fabrication.
We had plans. Big plans. Plans to send staffers off to classes. Classes on frame building. Classes on bike mechanics. Classes on mountain bike skill instruction.
But things got in the way. Employees moved on, work and family schedules quickly closed down the few windows of opportunity we had to learn from the experts. But we didn’t give up on the idea of an education issue. Instead, we polished up our DIY skill set and got down to business. DIY is at the core of Dirt Rag’s DNA, and setting up the basement of Dirt Rag HQ to fabricate and repair things felt very natural.
Disclaimer: Don’t take anything we write here as instructions or a how-to. While we encourage everyone to try new things and do cool shit, getting proper instruction and staying safe is a damn good idea. Fumes, fires, explosions and other bad stuff might happen. Be prepared, stay safe, be smart. When in doubt, don’t look at us.
The lugged steel frame has become as timeless as an analog watch or a pair of Italian leather dress shoes. From basic and functional to ornate and impractical, lugged frames, watches and shoes run the gamut from mass-produced to incredible craftsmanship. What better way to build a first frame than to start with the classic design?
I’ve been wanting to build a frame for decades. I still have a clear memory of being handed a torch the last day of a mechanics course at the United Bicycle Institute, and brazing in a water-bottle boss to a piece of scrap tubing. It wasn’t a lesson per se — just a quick, hands-on demonstration. This was in the ’90s. Much has changed in bikes and in my life, but that torch lit a tiny flame that has been sputtering around in my brain for the ensuing years.
What I didn’t do in those ensuing years is learn much about working with metal. But between a few books, lots of YouTube and general handiness, I figured I would make something that is at least rideable.
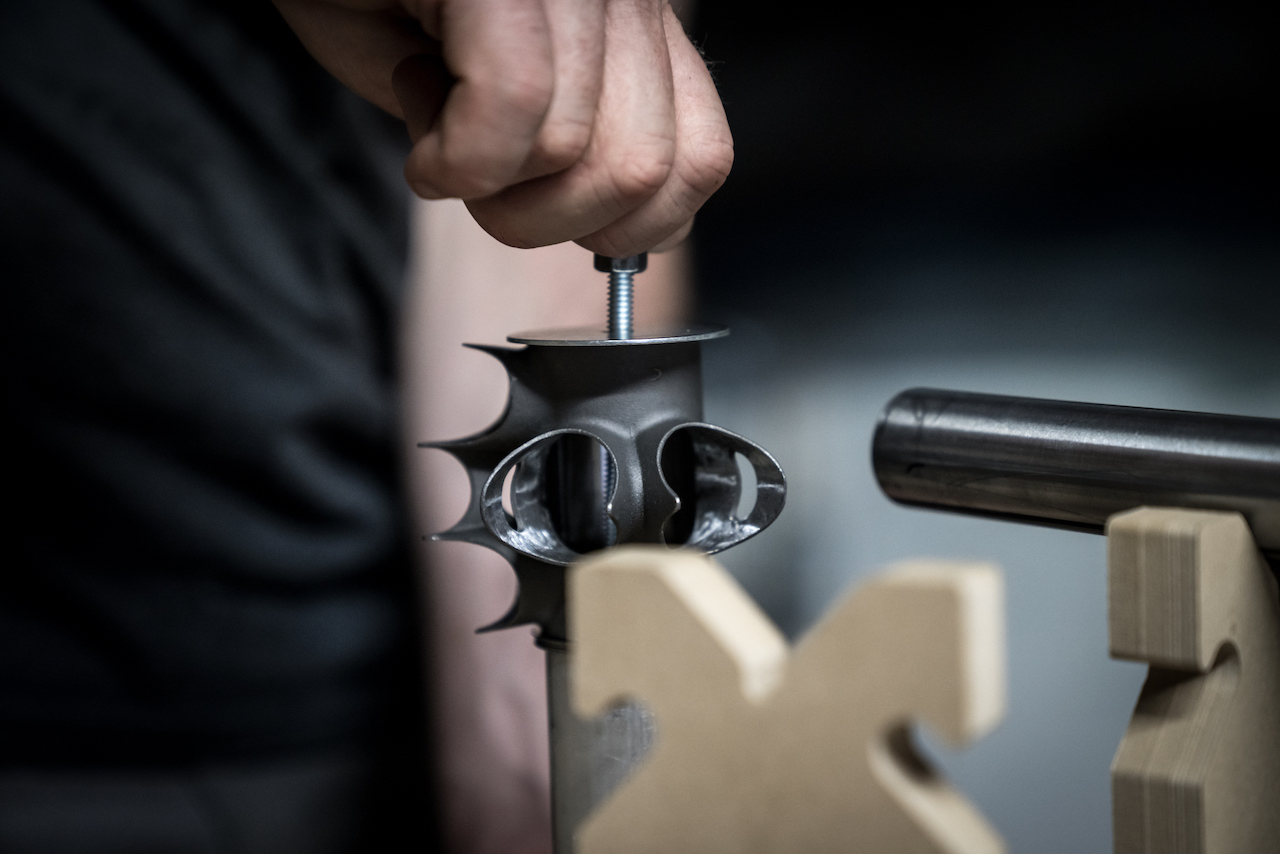
While a jig isn’t necessary to build a frame, particularly a lugged frame, I was curious what was out there to help beginning builders get something together. The Jiggernaut quickly showed up as one of the few turnkey, low-cost jig solutions. The Jiggernaut is inexpensive because it uses CNC-cut MDF (medium-density fiberboard) rather than metal to hold the frame in place. There are some obvious downsides, including the fact that MDF and torch flames aren’t a good mix and MDF isn’t going to create the accurate alignment you’d get from a well-built metal jig.
But I figured it wouldn’t hurt, and really, MDF smolders a lot more than it burns. The real safety issue is the tool used to provide the heat. Some people seem OK with MAPP gas torches for frame building; all of the experts seem to use the classic oxygen-acetylene (or sometimes oxygen-propane) torch and tanks set up, so I hit up Craigslist and found a deal on a small outfit of tanks, hoses, regulators, and torch for under $200.
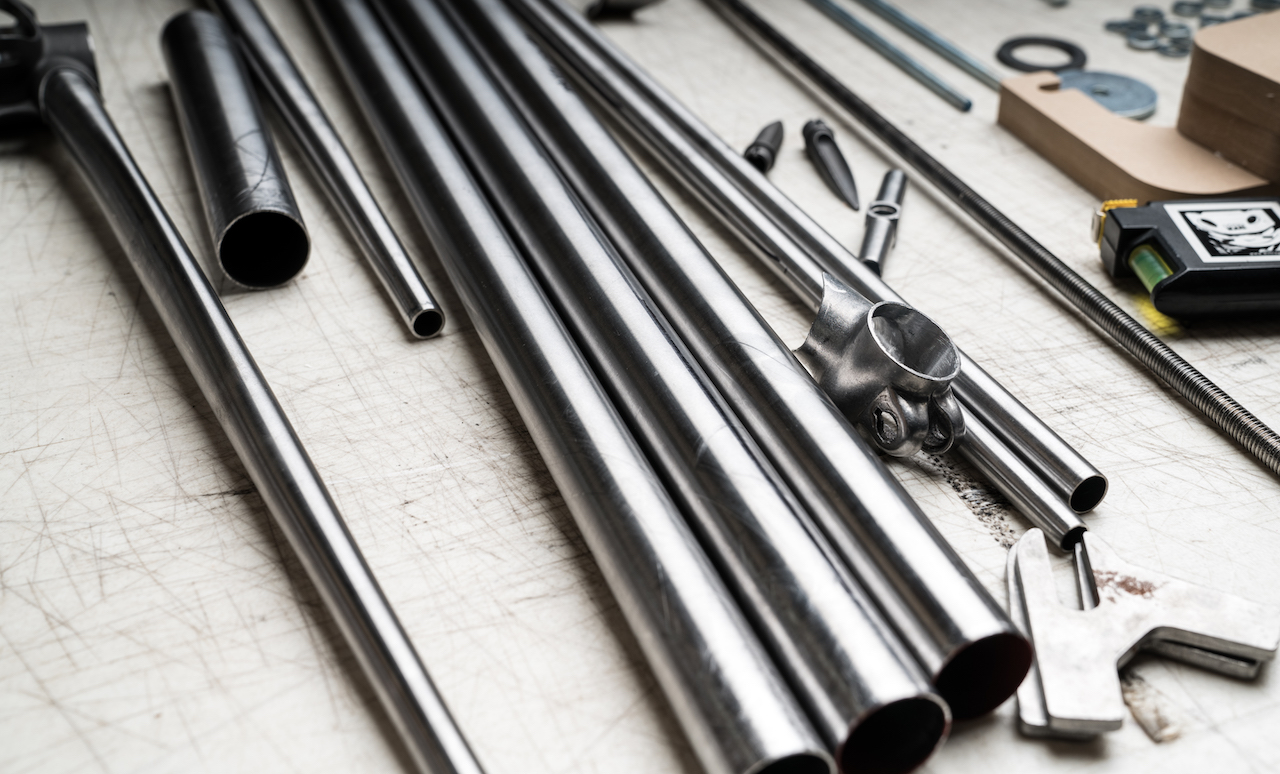
Other than paste flux and some 56% silver brazing alloy, the rest of the supplies came from home or Dirt Rag’s workshop. A hacksaw and half-round file will handle most of the tube mitering, and a drill is needed to make vent holes. More and better tools are going to speed up the process, and a Dremel tool and bench grinder help move things along. I hacked together some tubing blocks to hold things while I mitered them out of scrap 2-by-4 pieces. A bench vise is almost a necessity for this job as well. It’s better to buy used and old than cheap and new. Old American-made vices are relatively inexpensive and are in a totally different league of quality compared to modern imported vices.
The Jiggernaut came as a kit with a basic lugged road-frame kit. And by basic, I mean old-school: non-oversized tubes, 1-inch head tube, and basic horizontal dropouts. In other words, perhaps a perfect first frame. Rather than building something I’d be tempted to thrash off-road, this frame is probably going to end up with a basket and flat pedals on city-bike duty, not blasting down rough singletrack.
I was pretty happy with all my miters and lug fit-ups, although one of my top-tube miters was upside down and a few degrees out of phase. Fortunately, I planned to have a much longer than a traditional top tube, but after these mistakes, I ended up with one just a few millimeters longer than standard.
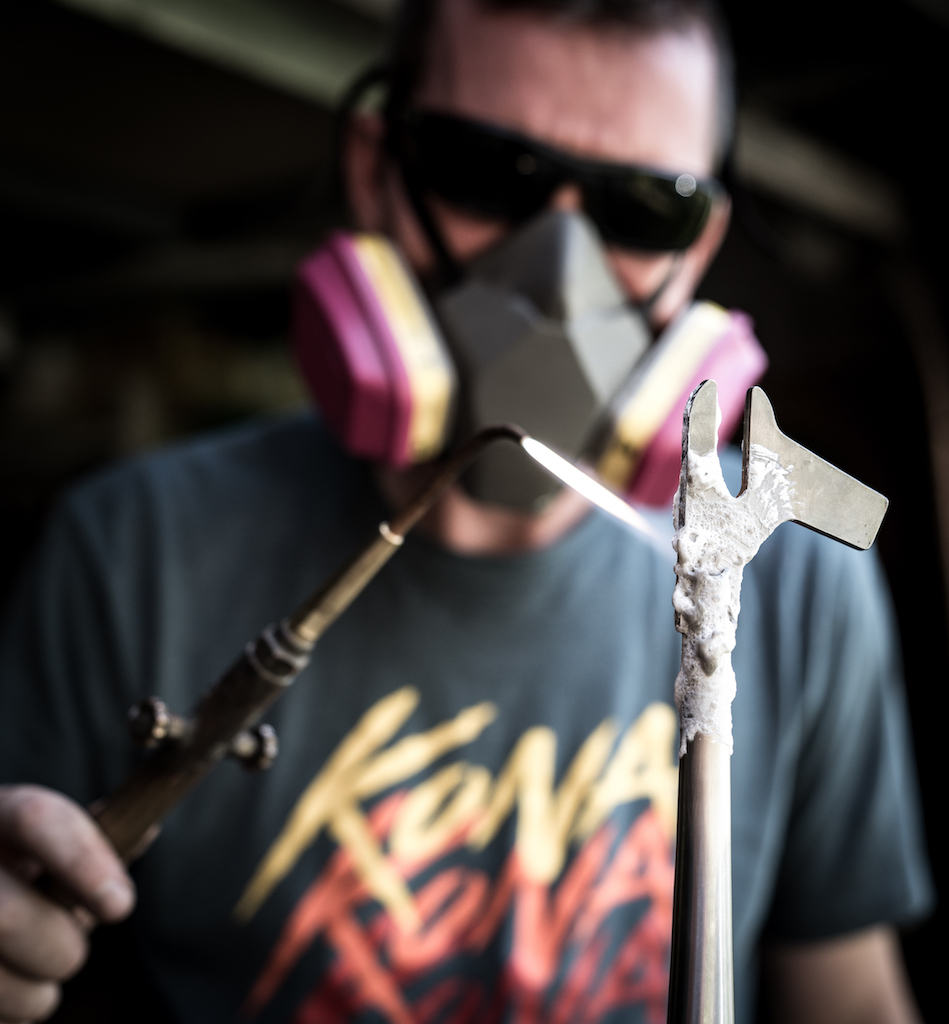
There seem to be as many ways to build a bike as there are people who build them, so I took my own path to a process that worked for me. For the most part, this had me brazing outside the jig, for both fire safety and access issues. A standard repair stand came in handy here to hold things as I heated them.
The brazing itself was one of the more frustrating things I’ve undertaken in years. The dark glasses, the melting flux, the lack of skill or even understanding of the processes all conspired to make things difficult. But after totally burning the flux on the first joint, I went back to the books and YouTube and the internet forums, realized my mistakes, cleaned everything up and started again.
This time I moved more slowly and methodically, seeing just how the flame heated the flux and which part of the joint needed more heat to ensure a fully brazed connection. In theory, I should have spent time on practice joints, but in practice, trying to build a frame during the busiest media-travel period of the year left precious little time for anything other than getting down to business.
As of this writing, the frame is still not complete. I’m starting to feel more comfortable with the torch, but I’m already out of acetylene and still need to braze the chainstays to the bottom-bracket shell, and fit and braze the seat stays to the dropouts and seat-tube lug. Then I need to trim the excess head-tube and seat-tube material and tap and face the bottom-bracket shell. And miter and braze in the brake bridge. And find a fork. And parts. Lots still to do.
This is a big task, but at this stage, the improvement comes fast and furious. Brazing each connection had its own set of difficulties, but each of those also taught me a tremendous amount about just how little I knew about what I was doing. But getting even tiny things right was incredibly rewarding.
Rewarding enough that I’ve got more materials on order, including some scrap for proper practice joints. Even though what I’ve built here is probably of lesser quality than any basic steel frame you could buy on the internet, and the cost in both supplies and labor is ridiculous, the experience was well worth the time.
Keep in mind, this isn’t a cheap endeavor. If you don’t already have a decent set of tools, you’ll need to spend a few hundred for the basics. The tanks from my Craigslist torch needed to be inspected before the local welding supply would swap them for full tanks, bumping the price up to almost $300 before it was ready to use. The brazing alloy and flux came out to $50, and the Jiggernaut and lugged frame kit are $529. Add in some brazing glasses, new filters for my respirator and a few other odds and ends and it’s easy to see this project is going to cost about $1,000.
Acetylene is a big issue for most insurance companies; homeowners and renters should talk to their insurance agent. For lugged building, a propane/oxygen setup might be a good idea, although almost impossible to find used. A TIG welder won’t set off alarms for any insurance, but the learning curve is even steeper than brazing, and a good used machine is going to cost over $1,000.