The Pisgah Stage Race bike and gear guide
Originally posted on April 19, 2018 at 1:52 amBy Andrew Vontz
In 2017, I competed in the five-day, five-stage Pisgah Mountain Bike Stage Race, survived the most technical trails I’d ever ridden on a demanding course and came away with strong ideas about how to do better in 2018. Based on what I learned and extensive conversations with Pisgah honchos like Chris Komanski, (who with his wife, Lauren Komanski won the coed duo division in the 2018 edition), I came back to Pisgah in 2018 with a setup that I thought would be optimal for the race. Here’s what I chose to buy, how it worked, and what I will change the next time I go back to do it again.
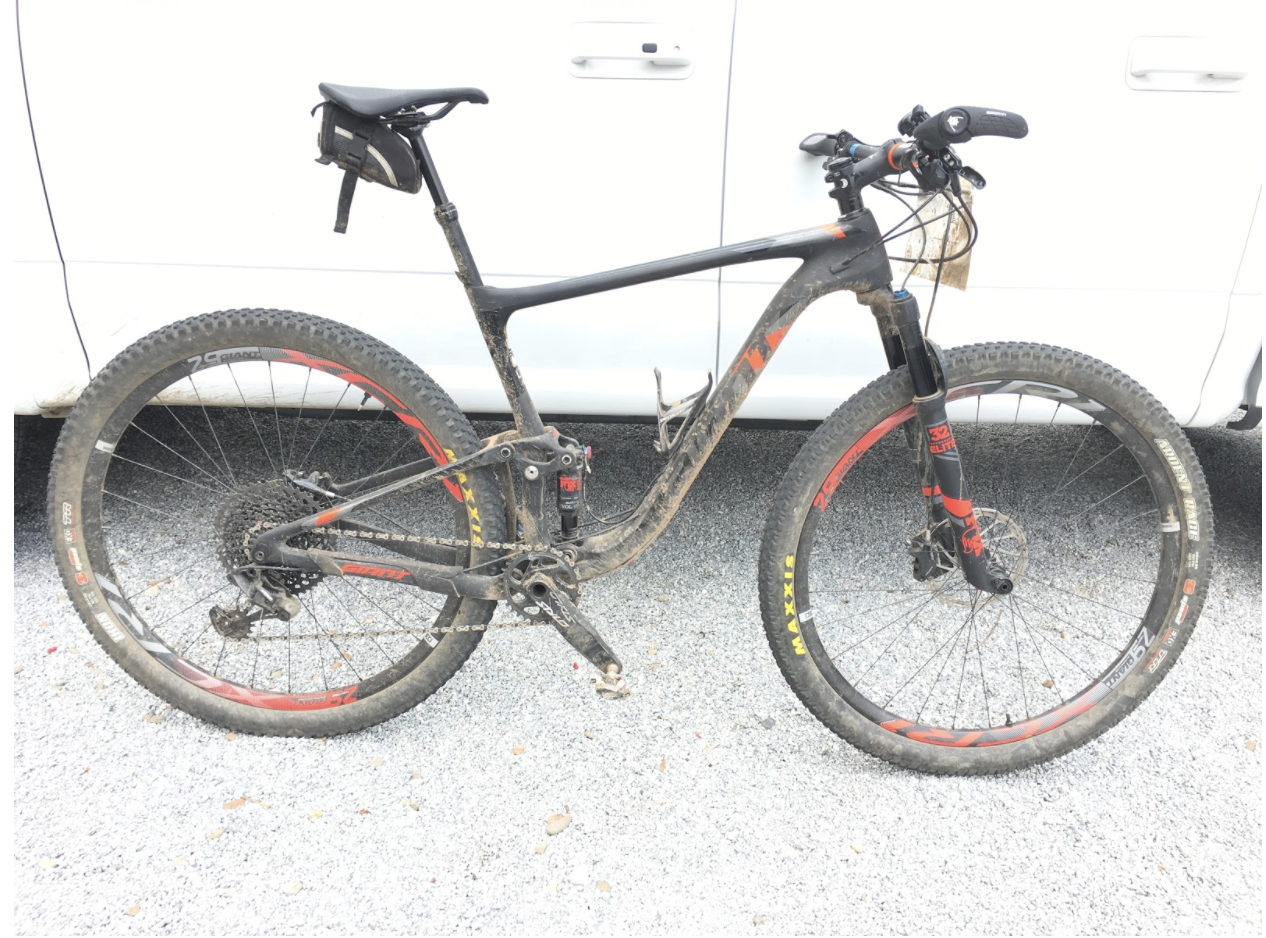
The Bike: Giant Anthem 29 Advanced Pro 1
Pisgah has a blend of brutally technical (for me at least) downhills, 20,000’ of climbing, a good chunk of it on doubletrack and fire roads along with a few miles of flat and rolling pavement and gravel. I’d raced a 27.5” bike in 2017 that had 110 mm of rear travel and 130 mm of front travel.
Leading up to the 2018 race, I knew I wanted a 29er to better tackle the climbs and to more easily roll over the roots and rocks that define riding in Pisgah. I also wanted dual lockouts I could operate from the bars so that I could easily toggle my shocks on and off for more traction on steep climbs and more power on flats and high traction climbs. I’d used the lockout levers directly on my shocks on the long climbs frequently in 2017, but I knew I would’ve used them more if it had been as simple as pushing a thumb lever on or off.
From talking to different top-level racers and based on my own experience, I also felt like I could get away with a shorter travel bike. About 100mm front and rear seemed to be the way to go. And it needed to have a frame with a water bottle mount in the main triangle that was more than cosmetic–I like to swap between running a liter bottle and a Camelbak depending on the stage and I need to be able to get the bottle in and out of the cage easily without getting my hand stuck on a shock, something that happened on a few of the bikes I demo’d. A dropper post, not a common feature on all XC-specific bikes, was mandatory.
I wanted a light bike, but it needed to be durable–I weigh close to 200 pounds–and it needed to be a good value because I didn’t have an unlimited budget. While a $10,000, 21-pound bike with Di2 XTR would’ve lit my fire, it wasn’t in the cards this go around.
Ultimately I considered a number of different bikes from Pivot, Santa Cruz, Specialized, Cannondale and other brands who all make great 100 mm bikes that fit most of my specs. Ultimately, the bike that best fit my needs and came closest to meeting all of my specs was the Giant Anthem Advanced Pro 29 1. It retails for $5,000 with SRAM Eagle GX components, comes stock with Giant carbon wheels, you can fit a liter-sized bottle and cage on the easily accessible downtube water bottle mounts, and it has 90mm of rear travel riding on a high-volume, trunnion-mounted shock and 100m up front with dual-remote shock lockouts you control from a dual left-side thumb lever. Once I made a few changes based on what I’d learned in 2017, it was close to the perfect bike and I was extremely happy with my setup throughout the 2018 race. Read on to see what I changed and why as well as a look at the rest of the gear I chose specifically for Pisgah.
KS Lev Integra Dropper
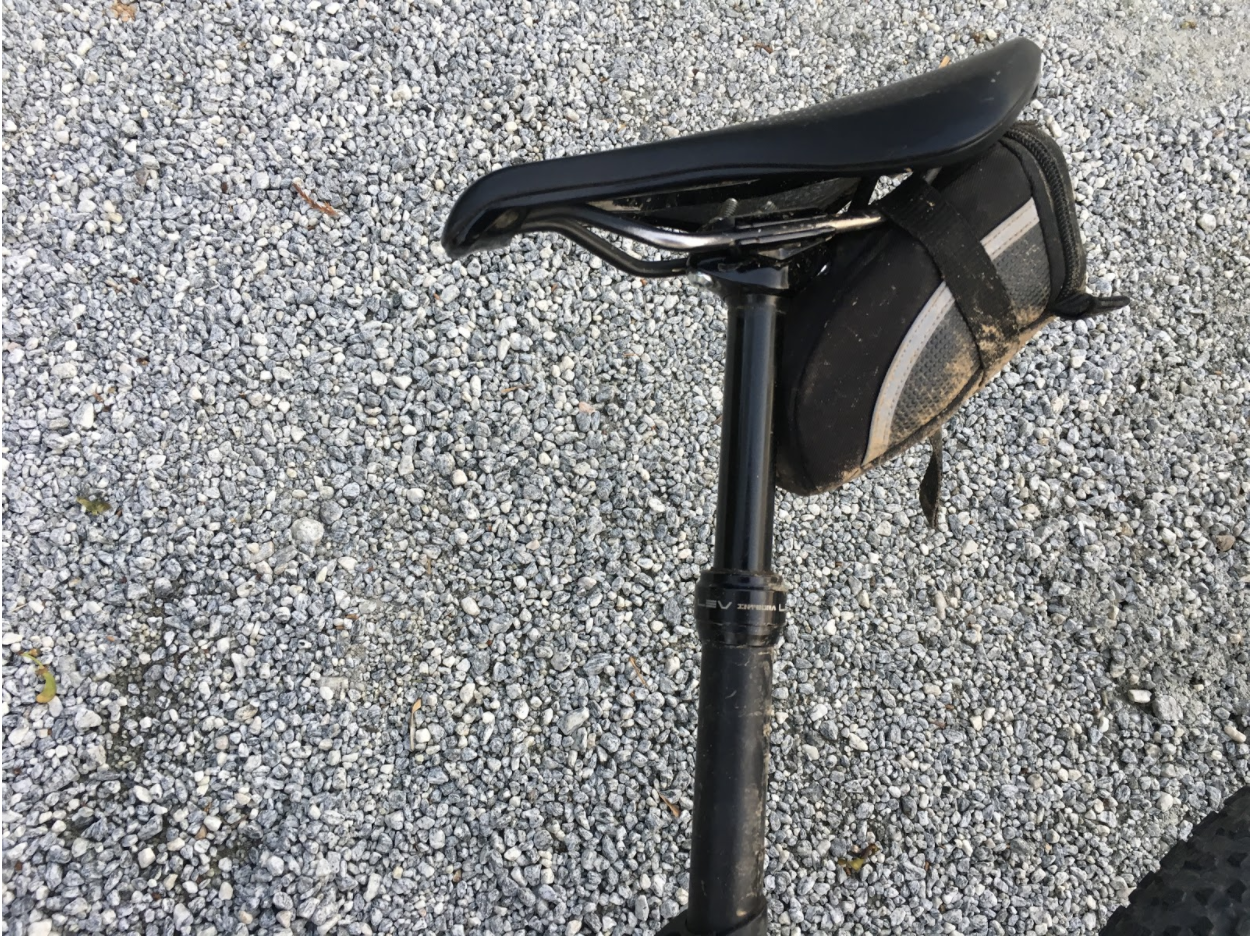
While some exceptionally skilled riders have no problem ripping Pisgah on a tall post, I’m not one of them. I had to have a dropper post on my rig. The Giant is built for full-on XC and marathon racing and comes stock with a rigid carbon post that’s 27.2mm to provide a touch of passive suspension. Because 27.2mm is a rapidly disappearing seatpost diameter in the mountain bike world, I had severely limited choices when it came to selecting a dropper. I knew I wanted it to be internally routed and the only options I could find were a house brand dropper that Chain Reaction used to make that wasn’t in stock and the KS Lev Integra. Both posts had good reviews and were comparable in weight but the Chain Reaction post cost about $200 less. I searched high and low and couldn’t find one, so I went with the KS Lev Integra. I had no complaints, it did its job and I like that it’s cable-actuated which makes it easier to remove from the frame when packing the bike than a hydraulic-actuated dropper. This added close to a pound to the bike, but the tradeoff was well worth it and if you go to Pisgah, I highly recommend you go with a dropper post.
Stages Carbon SRAM GXP Crankarm

I raced Pisgah in 2017 without a power meter so I only had heart rate data from the event. While I don’t spend a lot of time staring at a power meter while mountain biking and recommend that you don’t either, there are scenarios where having a power meter can be really handy–like a few hours into a race when you’re on a 30-minute fire road climb and you want to pace yourself without blowing up. My coach, Tucker Olander of Ultreya Coaching, built an excellent power-based training program for both of my assaults on Pisgah in 2017 and 2018 and based on data from those programs plus my overall training history, I have a strong sense of what kind of power I can put out in different racing scenarios. While I wasn’t anywhere close to being in the hunt for the win at Pisgah, I did want to do my very best, and having a power meter on my bike was invaluable. I tended to never look at it in the first hour of racing because I was going a bloc just trying to hold onto the hardest pace possible as long as possible, but once the initial fireworks had gone off and the race was strung out, I would look at my power on long climbs to make sure I was pushing myself appropriately. In training, I had always ended the last hour of my long weekend interval sessions targeting all climbs at a normalized power of 290 watts or higher. That training gave me the confidence that I could push that pace on any climb, at any point in the race, even on days four and five.
You may wonder why I have black electrical tape wrapped around the crankarm. While the Stages power meter is waterproof, that’s only if there’s not an ingress of water. At Pisgah, you ride through more than a dozen bottom-bracket deep creek crossings during the race. To keep water from getting into the battery and shorting out the arm temporarily (pro tip: most of the time you just have to let your Stages dry out if the battery compartment gets wet and it will work again), I seal the outside of the power meter unit with material from a silicone earplug and then wrap it tightly in electrical tape. Looks dumb. But it works. I had accurate power readings during the entire race with no water ingress issues.
Maxxis 3C EXO TR Tires: Ikon 2.3” rear & Ardent Race 2.3” front

The Anthem comes stock with Maxxis Ikon 2.2” 3C EXO TR tires front and rear. I know some people who race these at Pisgah. To compensate for my lack of technical skill I chose to go with slightly bigger 2.3” Maxxis treads front and rear, sticking with the Ikon for its low rolling resistance in the back and going with a more aggressive Ardent Race tread in front. Maxxis tires are THE tires of choice in the Pisgah area. Most locals run much burlier Maxxis treads for day-to-day riding, but for racing, the Ikon is extremely popular. It’s absolutely critical to run the EXO version with reinforced sidewalls. If you’re not used to riding this kind of terrain, it will blow your mind when you see the hundreds of opportunities you have to tear a sidewall every day. While this design doesn’t completely rule out that possibility, it makes it less likely, and thus, it’s worth the extra weight.
Specialized Power saddle

This one is simple–I run Specialized Power saddles on all of my bikes, because they’re what works for me. While many mountain bikers prefer a longer saddle that allows them to move fore and aft and better control the bike, I prefer the snub-nosed power. It’s what works for me. So I pulled a Power saddle off of my cross pit bike and put it on this bike.
Ergon GP3 grips and bar ends + SAHMURI Sword tubeless plug system

In one regard, I am a 1%’er. I’m in that 1% of riders who still rides bar ends. While all cool mountain bikers in the world seem to get all of the leverage they want from 780mm bars, I prefer a wide bar AND Ergon GP3 grips with integrated bar ends. I started mountain biking in 1989, lusted after the original OnZa bar ends, and ever since I put a pair on my first real mountain bike, a Specialized Stumpjumper with Shimano Deore DX thumbshifters, I’ve been using bar ends. I still think they’re great and appreciate having mulitple high-leverage hand positions while climbing and on flats. The one downside is that it does increase the probability of snagging a tree or branch on overgrown trails, which you will definitely run into a few times at Pisgah. I’m willing to take that risk because I think what I get in return is well worth it.
The bar plugs I use are the SAHMURAI Sword Tubeless repair kit; they integrate the two tools needed for plugging tubeless tires into expanding plugs. I store the actual tacky plug strips in my seat bag. It’s an ingenious design and means I have to carry one less tool in my jersey or seat bag. Luckily, I never had to use the system at Pisgah since I didn’t get a flat. But I liked the peace of mind having this setup gave me.
Bell

One of the few written rules of the Pisgah Mountain Bike Stage Race is to be cool. While everyone is going for it, this isn’t the place to show up and rage on other racers. You’re on tight singletrack where passing can be tough, if not impossible. While you can call out a ‘track’ or ‘line’ and people will move, there’s something cheerier and more friendly about pairing that with the ding of a bell. Just dinging it often will lead to someone just pulling over or offering to pull off to let you past. And when you’re slobbering on yourself and can’t see straight in the middle of a 40-minute fire road climb, you can give it a few dings to just cheer yourself up, too.
Generic Seat Bag

Many racers use a large velcro strap to hold a spare tube and supplies somewhere on their frame, as low as possible, so as to minimally impact bike handling with weight high on the bike. And some dropper posts don’t work with seat bags. Mine does and a seat bag seemed like the simplest, most reliable way to hold most of the stuff I need in one place that I knew it just wasn’t going to fall off the bike. A seat bag also has the advantage of keeping your tube out of the sun where UV can actually damage it–how bad would it suck to have to put a tube in your tubeless tire than have the tube fail because it had been sun damaged or rubbed through on your velcor strap? I may explore a velcro strap setup in the future, but for Pisgah I used this totally seat bag that I bought off of Amazon for $12. Couldn’t tell you how much it weighed, but it safely held all of my backup tire repair materials: a tube, a tire lever, two CO2’s, a CO2 inflator head, the tire plugs for my SAHMURAI Sword system, an Eagle chain connector, a CR2032 battery in case my heart rate monitor or power meter battery died and a section of tire tread I cut out of an old road tire to use as a tire boot. Thankfully, I didn’t have to use anything in this bag during the race. I’d guess it added at least half a pound if not more to my setup, but again, weight well worth carrying.
Course profile stickers on bars

You’ve likely seen pros in road races who have pieces of tape on their top tubes or bars with critical information about different pave’ sectors or climbs written on them. One of the many small touches that Blue Ridge Adventures, the organizers behind the Pisgah Stage Race, do that make this race a standout event is to provide you with a course profile sticker for each stage that provides elevation, distance and surface information. I taped the sticker for each stage to my bars and would study my Strava files from the previous year to get a sense of about how long each section took and how fast the best riders rode them. It was very helpful for pacing and also to mentally chunk the big effort of each day into small, bite-size pieces that enabled me to focus on just getting to the next section of course each day.
Drop bag
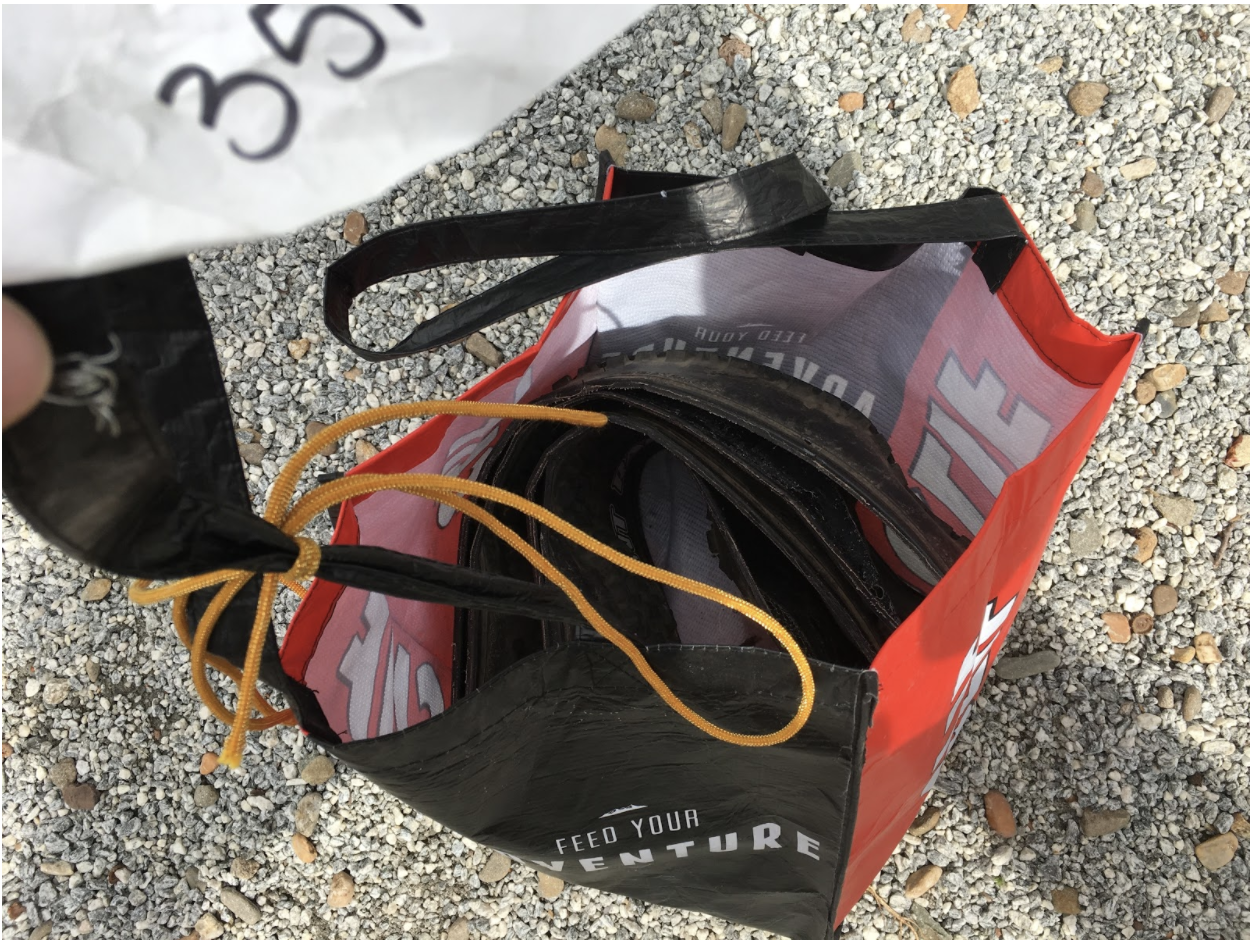
I used a combination of bottles and a Camelbak depending on the stage. The first year I did Pisgah, I didn’t use the race-provided drop bag. You leave the drop bag at the start and they shuttle it to the rest stop. This year, I saved substantial time leaving my pre-mixed bottles in my drop bag. And after I saw a few racers had spare tires in their drop bags, I realized that was a hell of a good idea and stashed a spare tire in my drop bag, too, in the event I had a tear and needed a replacement.
Camelbak, multitool & flask
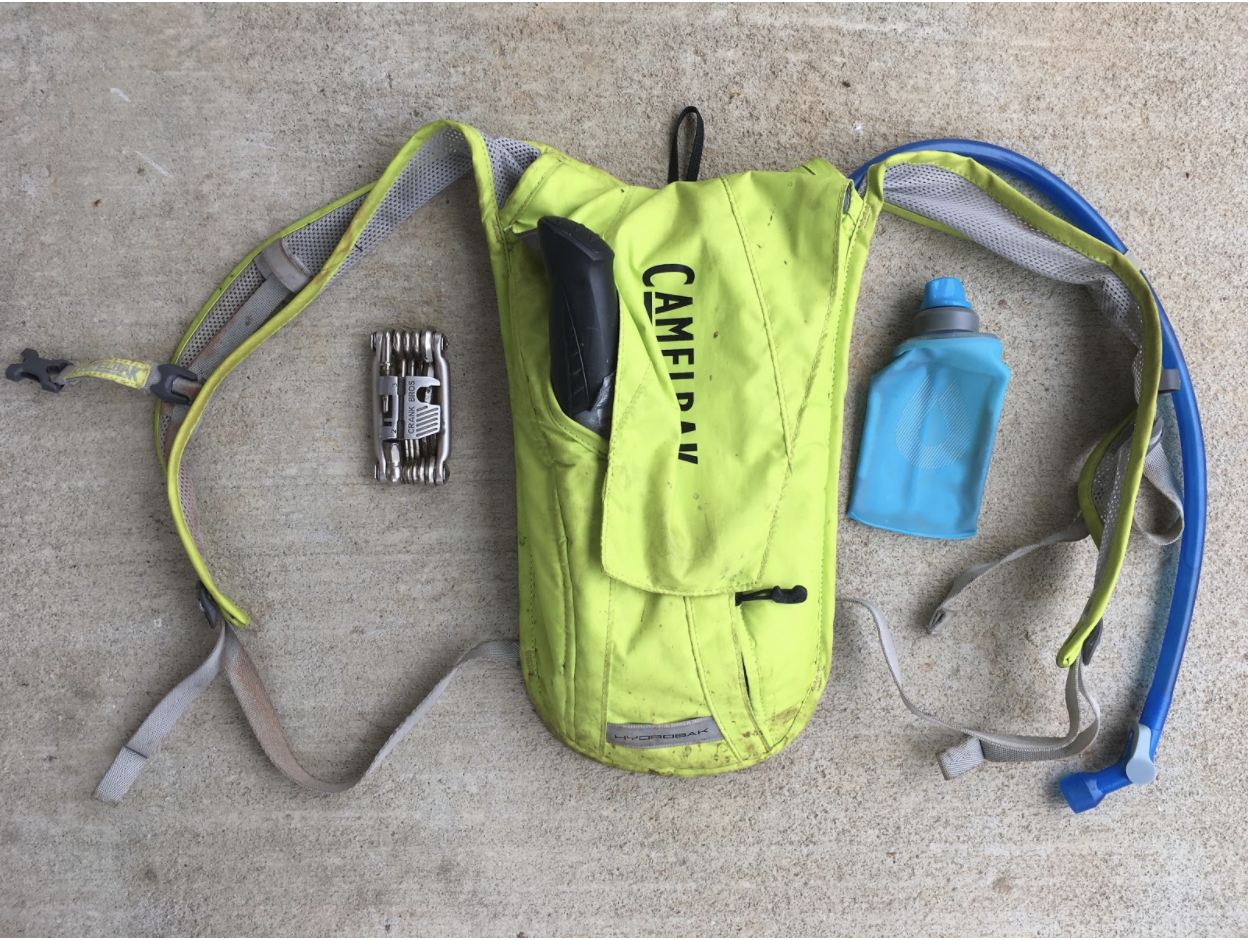
The Pisgah Stage Race takes you into some heavy and remote trails and several stages are point-to-point loops or lollipops. That means that some days you ride 10 miles before you hit an aid station and some days it can be 20 miles. Planning your nutrition and hydration and figuring out what to carry and what to have waiting at an aid station is clutch. Most top competitors stick with just bottles, no matter the terrain. On stages with an even mix of fire road climbing and singletrack, I ran bottles because I had ample time to take my hands on and off the bars safely. On heavier days, like the days we traversed Squirrel Gap, I used a Camelbak because I knew I wanted to be able to eat/drink (I run a high carb drink mix for fuel) while keeping my hands on the bars as much as possible + a bottle I had waiting at the aid station on the other side of that challenge. I used the 1.5-liter Camelbak Hydrobak in stunning high visibility yellow. On days I ran bottles, I carried my pump in my jersey and on Camelbak days I would wedge it into the pack. Everyday, I carried a CrankBros multitool that has everything I need for any trailside repair including a chain tool–an absolute must have–and a Hydrapak flask that I used to carry an emergency reserve of 100ml of maple syrup. That came in handy on the last two stages when I needed a shot of sugar to get through some tough moments and wake up my brain so I could focus on handling my bike.
CarboRocket
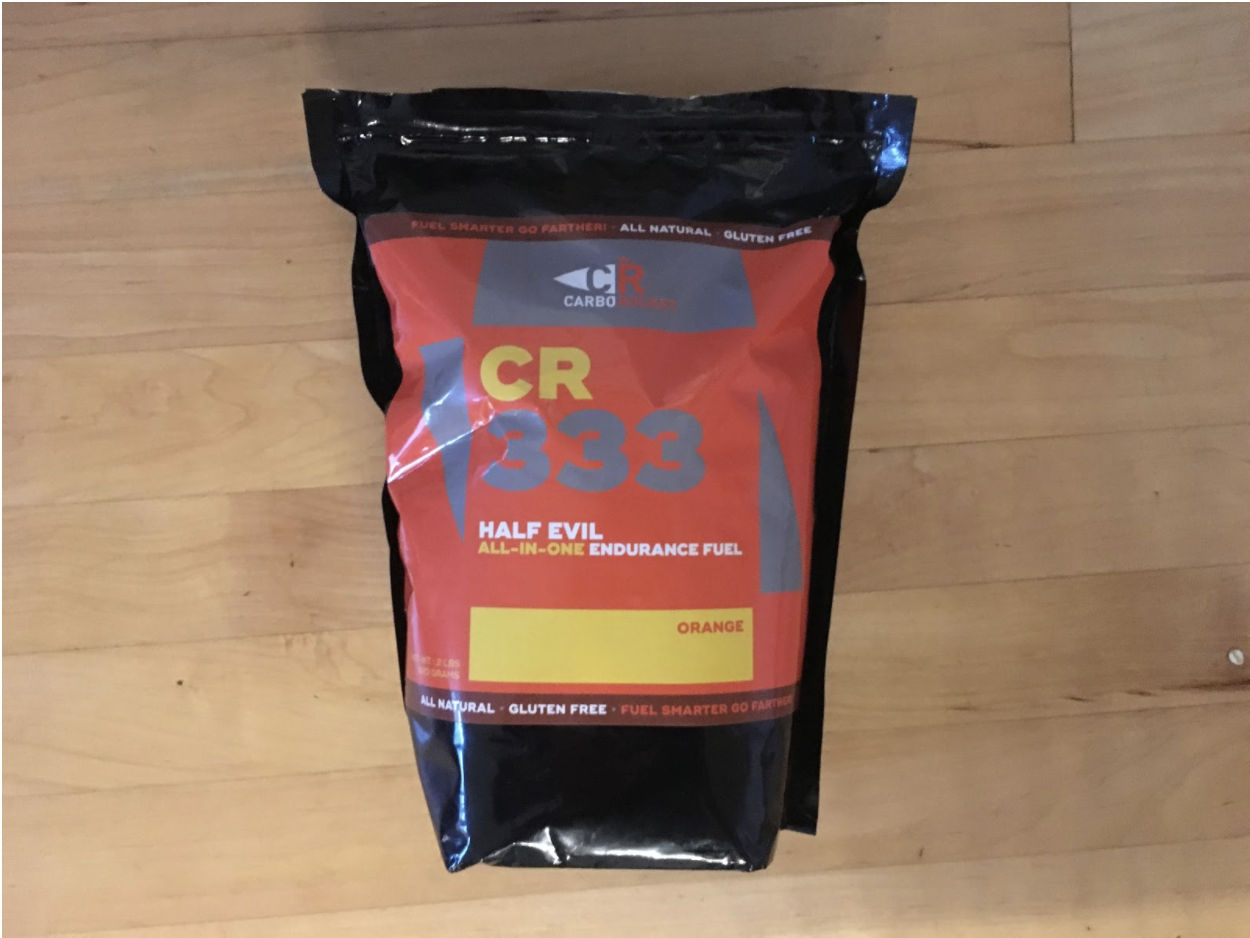
As noted, it can be challenging to find spots to pull food in and out of your jersey on large chunks of the course due to the technical terrain, the steepness of the terrain, the intensity at which you’re riding or all three. In 2017 I’d used real food and water with sea salt. In general, that’s my preference. I’m not a big fan of engineered food and I know from research and I story I wrote in the early 2000’s that the combination of sugar and electrolytes in sport drinks is horrible for your teeth. But I set aside those reservations and experimented with different designed food options in the months prior the race until I found CarboRocket. With CarboRocket, you can mix up to 333 calories in a single bottle derived mainly from maltodextrin with some sucrose, glutamine, BCAA’s and electrolytes. I used a less concentrated mix, opting for about 260 calories per liter of fluid and drank one liter per hour throughout the entire five stages, making sure I’d had a quarter of a liter every 15 minutes. For me, this resulted in steady energy and no bonks in a way I’ve never really experienced before in my racing and training before using this product. CarboRocket isn’t cheap–it’s about $40 for a bag with 30 scoops that mix up 10 bottles at 333 calories. But it was worth it and I’ll definitely use it again. This was a big upgrade to my program.
Bag Balm

At the 2017 edition of the Pisgah Stage Race, temps were on average about 15 degrees higher than in 2018. I had problems with heat rash in 2017 and developed some gnarliness in my nether regions three days into the race in spite of applying ample what I thought were ample amounts of Bag Balm to my tender zones every day before the race. In 2018, temps were lower, but I also applied much more Bag Balm every day before the race to every area of my crotch that had contact with the saddle + my nipples–if your sweat dries out on your jersey during a descent, lycra can turn into sandpaper and start sawing into that area as well. Additionally, I got out of my lycra as soon as possible following the race, baby wiped everything down and then after showering back at the AirBNB then slathered everything with another round of Bag Balm. I had zero problems with chafe, saddle sores or skin irritation at any point during the 2018 race. Cycling-specific chamois products are great, but when used properly, Bag Balm is nearly invincible. And you can buy a tub that will last several years for about $10.
What I would change next time:
My setup worked very well and my biggest limiters in the race were my skill and my weight–you can always get better at handling your bike and like me, most people have some body fat to shed. But overall, I was very happy with the equipment I chose and my experiences during five days of intense racing validated the choices I’d made. The one thing I would likely change if I do Pisgah again would be upgrading to a 120mm fork. While talking to Kerry Werner at dinner one night about his Pisgah setup, he said he runs a 120 mm fork because he thinks the smidge of extra weight is well worth the extra cushion over the course of the race. If there’s a next time for me, that’s the one change I would make to my kit.
If you missed Andrew’s Pisgah Stage Race recaps, you can check them out here.
Andrew Vontz (www.andrewvontz.com) writes about people, places and things at the limits of human experience. His work has appeared in Rolling Stone, Outside, Bicycling and many other publications. He competed in the 2018 Pisgah Mountain Bike Stage Race, north America’s premiere mountain bike stage race, finishing 10th in the 40+ division. Go here to read his account of all five stages (add link to my race diaries here). You can find him on Twitter @vontz and on Strava here. You can find him on Strava here.