Old Bike, New Look
Originally posted on October 29, 2019 at 0:52 amBy Stephen Haynes
Whether cutting the sleeves off a brand-new T-shirt or remodeling the interior of a home, the desire to tailor one’s possessions is a siren song most of us succumb to at some stage of our existence. It’s human nature to personalize artifacts to reflect whatever self-image we’ve contrived, imbuing these things with what we consider a personal style or motif so that we’re included in a social group or, more often than not, able to express a certain aloofness toward acceptance.
We who feed at the trough of bike culture certainly aren’t immune to this pull. With the ceaseless array of mountain bike products available and marketed as mandatory tools of the trade, the possibilities are nearly limitless with regard to how and what we bedazzle.
For the purposes of this article, however, our focus will alight and remain on cosmetically augmenting a single bicycle frame. The frame in question is a late-model Cannondale dirt-jump bike that, despite having averted cannibalism to satisfy the whims of the countless bicycle-build projects evolving in an adjacent area, has been hanging, un-ridden and unmolested, in the bowels of Dirt Rag headquarters for countless millennia.
The means for cosmetic augmentation will be fulfilled by an air-drying particulate impregnated with pigment and forced, by way of pressurized air, from a metal canister through a plastic nozzle, which also serves as the primary button to discharge the particulate matter, initiated by the user pressing with varying degrees of force to disgorge as much or as little particulate matter as they choose until, like a fine, misty, toxic rain, the particulate matter settles and dries on the Phoenix-like bones of that old Cannondale. In essence, we’ll be discussing how to prettify the carcass of an un-ridden beast with spray paint. We used Spray. Bike, a bike-specific acrylic dry matte powder coating.
Preparation
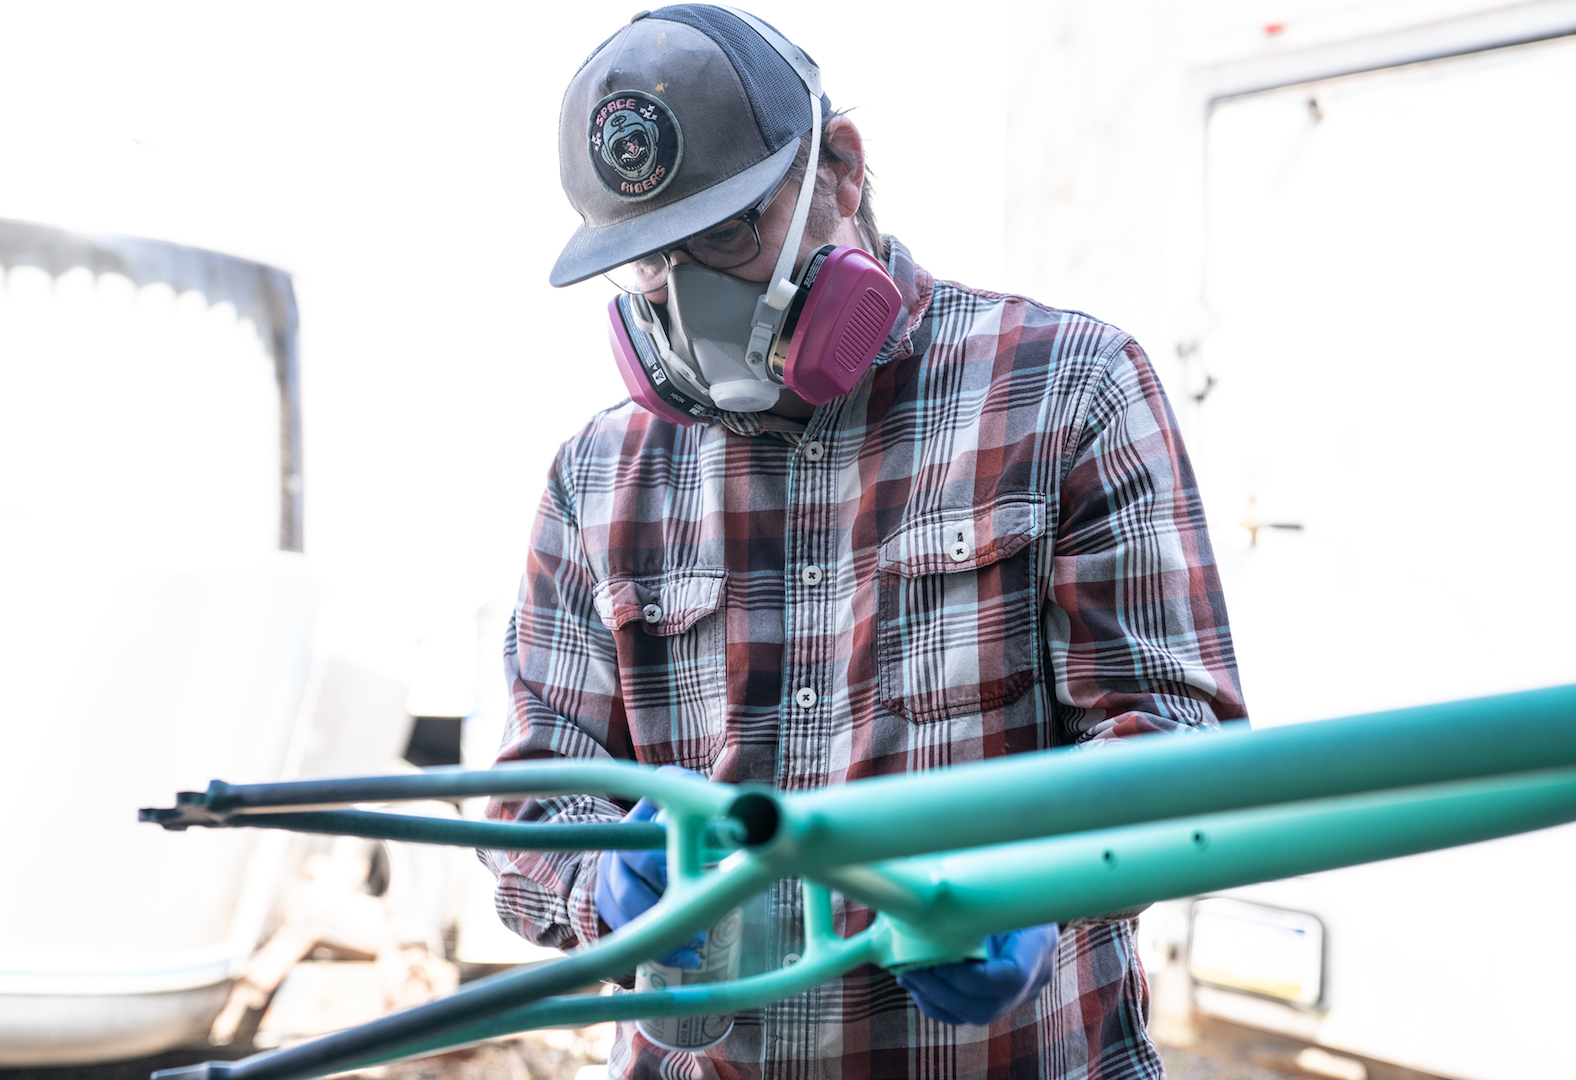
It’s tempting to apply the paint while your bicycle is fully clothed in all of its constituent parts and accessories, but I strongly advise you to resist this urge. If, like me, you lack the requisite knowledge to strip your bike down to the frame, please seek assistance from a master of such things — namely, your local bike shop’s mechanic.
Once it’s been freed from the shackles of its former existence, scour your bicycle clean of any detritus, filth or film that may be loathe to leave its hide. An old dish sponge — the variety that has a soft, malleable underbelly mated to a gruff scouring pad — is ideal.
Dip your newly acquired bike loofa into a bucket of tepid water with a few drops of soft soap dissolved in it and scrub your bicycle frame vigorously enough to clean any errant dirt, yet lovingly enough to make a casual observer blush.

Once it’s clean and dry, endeavor to remove any semipermanent adhesive-backed vinyl identifiers — colloquially known as “stickers” and likely placed by the manufacturer, but possibly by one of the bicycle’s users — with a combination of fingernails, razor blades, paint scrapers or divine intervention.
The semipermanent adhesive-backed vinyl identifiers will leave behind a sticky residue, a sign of the mindless sincerity with which this particular adherent carries out its job, that will have to be removed. There are a number of products, with increasing toxicity, that can be employed to remove the residual stickiness. We used acetone, which worked well and, in the confined space in which we worked, provided some much-needed levity.
Free of grime, dust and the fecal matter of woodland creatures and mountain bikers alike, your bicycle frame is nearly ready for its lustrous new look. However, to achieve the best results from the paint, the surface of your steed — the very skin of your Phoenix — must first by plied with a very light, repetitive rubbing of fine automotive sandpaper, at least 220 grit or better.
Pigment-impregnated particulate matter
Now that all traces of your bicycle’s former identity have been removed, it’s time to breathe new life into that old frame by coating it in a veneer of color, or colors, whose particular hue and dispersal are the sole discretion of you, the visionary behind this venture.
Whole shelves of unread texts could be written on best practices with regard to the tasteful assemblage of color and its proportionate usage in relation to other colors, so I’ll spare you any idiosyncratic diatribes pertaining to any personal feelings about color and design. My own approach to applying pigment-impregnated particulate matter to the surface of a bicycle frame is one of free-form, touchy-feely, semi-organic intuition and is likely influenced to a great degree by my caffeine intake and my inability to focus on a task for more than a few seconds at a time.

Whether or not one should employ primer before applying the final, full-bodied finish is another area of debate. A white or light-colored primer will act as an intensifying launch pad for any color applied and is therefore suggested if one intends to use bright colors. Another thing to consider is that if the original hull of the bicycle is a patchwork of multicolored marketing, it may behoove the person applying the pigment to nullify said multicolored marketing with a fresh, solid-color primer before applying the new primary hue in earnest. In the instance of my dirt jumper, however, the matte black of the original finish provided both a stable substrate as well as a good test of the Spray.Bike paint’s coverage.
Once you’ve applied the primer (or not), you’ll need to contrive a way to hang the bicycle frame in order to avoid excess touching of wet paint. My favored method for doing this is mangling an old-fashioned wire coat hanger into compliance, fishing it through the head tube of the subject bicycle and then hanging the whole assembly from a nail in a rafter.
Apply the pigment as described by the manufacturer, or, short of that, in a sweeping motion across the surface of the frame, from 6 to 10 inches away, until the chosen color is fully realized, but before the paint begins to drip and run like a Ralph Bakshi movie effect. When in doubt, apply several thin, even coats rather than a single messy one. Unless you’re some sort of heathen.

Many times in the past, I’ve applied a veritable smorgasbord of paint types to bicycles, with varying degrees of success. You likely have something in your garage that will work just fine so long as surface preparation and patience are employed.
That said, I’ve rarely been as satisfied by the coverage of pigment-impregnated particulate matter as I have been by Spray.Bike’s offerings. Their formula, developed by a triad of companies, is a bargain at twice the price. I’ve been trying to formulate an apt metaphor to describe the way the paint feels as it leaves the compressed-air cylinder and the best I can do is this: Whereas typical spray paint is akin to painting with a refined mister bottle, the kind with which you might quench your houseplants’ thirst, or cool off your Mediterranean lover amidst a tryst, Spray. Bikes’ formula is more like flocking, or adding a visceral texture to the surface on which you’re working. The pigment-impregnated particulate matter even falls out of the compressed-air canister differently — think snow versus rain. So while $16.99 for a 13.5-ounce spray can may sound excessive, each dollar over the amount you might spend on a can of Krylon is a step toward greater success.
Clear coat
A clear coat of some kind is likely a good idea, as most trails contain some form of benevolent foliage or debris trying to maim your person or your bicycle. While a good clear coat won’t endow your new paint job with some sort of force field, it will help deflect minor abrasions and everyday wear and tear.
The purveyors of the aforementioned pigment-impregnated particulate matter that I employed in the photos accompanying this piece were good enough to include their Keirin Sunlight Yokohama clear coat in Silver, which adds the needed layer of protection and also sparkles when hit with sunlight, which is as close to wizardry as you’re likely to encounter this century.
Of course, any good clear coat will add some level of protection to your bicycle’s new look, though most don’t offer these sorts of fireworks.

Conclusion
Now you emerge with your bicycle frame, its metamorphosis complete, a Phoenix rising from the ashes of its pitiful, marketing-strewn, logo-enhanced past, a bold and glorious triumph of personal expression and redemption, ready for the machined mechanical parts and accessories that will take it from being a static and stationary piece of admirable beauty to a kinetic work of art. Your work of art.
A note on masking
At any given moment, you may want to begin masking off certain areas of the bicycle, reverse engineering a finished look that’s more amenable to your sensibilities. This is fun and highly encouraged, though it should be noted that if you have a particular proclivity to symmetry, or are overly sensitive to misalignments, then perhaps a solid-colored bicycle will be more to your liking.
For those who, like me, are not burdened with any design sense and simply want to make weird patterns and eschew convention: Carry on.

My typical method of masking starts with the raw frame color. I typically mask off some small portion of the original frame color because, underneath this cynical shell, I’m a romantic at heart and I like the idea of a little piece of the original poking through. I leave these areas masked until the very end.
Using a combination of three-quarter-inch and 2-inch standard blue painter’s masking tape, I’ll wrap areas at angles or tear the tape to make irregular patterns, adding and removing as I see fit, between coats of pigment-impregnated particulate matter.
I’ve also employed various atypical objects to mask off sections as the mood strikes. These objects include, but are not limited to, flyswatters, mesh hat panels, forks, throwing stars, leaves and various organic material. The point is, you’ve already broken free of the tyrants of marketing design, so it shouldn’t be too hard to stretch your imagination a bit further. There are tons of patterns out there if you choose to see them, and lots of them can be used to enhance your steed.